


The Anatomy of a MacBook Display: Components and Their Functions
The display of a MacBook is one of its most prominent features, allowing users to view text, images, and videos in high resolution. However, many people do not know the different components that make up a MacBook display and how they work together to produce the final image. In this section, we will explore the anatomy of a MacBook display and the functions of its key components.
LCD Panel: A MacBook display uses a liquid crystal display (LCD) panel, which is made up of millions of tiny pixels. These pixels change color and brightness to create the images that appear on the screen.
Backlight: The backlight is the source of light that illuminates the LCD panel from behind. This allows the pixels to produce a visible image. The backlight is typically made up of LED lights that consume less power and provide a brighter and more uniform light source than traditional fluorescent lamps.
Display Driver: The display driver is a chip that controls the timing and signal processing of the pixels on the LCD panel. It converts the digital signals from the computer’s graphics card into the appropriate analog signals for the LCD panel to display the image.
Graphics Card: The graphics card is responsible for rendering images and videos on the MacBook’s display. It converts data from the CPU into visual information that can be displayed on the screen. The quality and capabilities of the graphics card will impact the performance of the display.
Display Connector: The display connector is the cable that connects the MacBook’s display to the computer’s logic board. It transfers the signals between the display driver and the graphics card. The display connector is also responsible for providing power to the backlight.
The Evolution of MacBook Displays: From CRT to Retina
MacBook displays have come a long way since the early days of computing. From bulky cathode ray tube (CRT) displays to sleek and high-resolution Retina displays, the evolution of MacBook displays has been marked by advancements in technology and design. In this section, we will explore the different types of MacBook displays and how they have evolved over time.
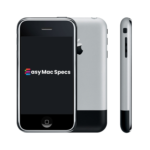
CRT Displays: The earliest MacBook displays used cathode ray tubes (CRTs) to produce images. These displays were bulky and heavy, and their image quality was relatively low. However, they were the only option available at the time and were still an improvement over earlier computer displays.
LCD Displays: In the late 1990s, MacBook displays began to shift to liquid crystal display (LCD) technology. LCD displays were thinner, lighter, and more energy-efficient than CRT displays. They also offered higher image quality and could display more vibrant colors.
LED Displays: In the mid-2000s, MacBook displays started to incorporate light-emitting diodes (LEDs) as a backlight source instead of traditional fluorescent lamps. This allowed for thinner displays and better color accuracy.
Retina Displays: In 2012, Apple introduced the Retina display, which offered a significant improvement in display resolution. Retina displays have a pixel density of over 300 pixels per inch, making individual pixels indistinguishable to the human eye. This results in a much sharper and more detailed image.
OLED Displays: OLED displays are a newer technology that uses organic compounds to produce light. They offer higher contrast ratios and faster refresh rates than traditional LCD displays. However, they are currently more expensive to produce and are not yet widely available in MacBook displays.
Screen Time Management: Best Practices to Protect Your Eyes and Boost Productivity
If you use a MacBook for long periods, you might experience eye strain, headaches, and reduced productivity. To avoid these issues, here are some best practices you can follow:
One, take regular breaks. Looking away from your screen every 20 minutes and focusing on something at least 20 feet away for 20 seconds can help reduce eye strain.
Two, adjust the display settings. Changing the brightness, contrast, and color temperature of your MacBook display can help reduce eye strain. Reducing blue light emissions can also improve your sleep quality.
Three, use a matte screen protector. This can help reduce glare and reflections, which can cause eye strain and headaches.
Four, maintain proper posture. Good posture is essential to avoid neck and back strain. Consider using a laptop stand or external keyboard and mouse to achieve a more ergonomic setup.
Five, limit screen time before bed. Blue light emissions from screens can disrupt your sleep-wake cycle. Limit your screen time in the evening and use the Night Shift feature on your MacBook to reduce blue light emissions.
Six, use productivity tools. To stay focused and reduce distractions while using your MacBook, consider using productivity tools such as time-tracking apps, to-do lists, and productivity timers.
By implementing these best practices for managing your screen time, you can help protect your eyes and improve your productivity while using a MacBook.


